SEO Migration Guide: Redesign Your Website Without SEO Damage
- Home
- Knowledge Sharing
- SEO Migration Guide: Redesign Your Website Without SEO Damage
So you've finally made the decision to rejig your current website — kudos!
Whatever your reasons for doing that — improving usability, better relaying your brand values, or just adding a new spin, service, product, or team member — one thing is certain — you do NOT want to lose all the SEO that you developed on your old site while switching to the new!
Every website redesign needs a thorough SEO Migration Strategy. And that's what we are here for!
To assist business owners and web designers, we've developed this Website Migration SEO Checklist so you don't have to worry about losing your SEO momentum and can focus on more important things like looking forward to all the positive changes your new website will bring!
All you have to do now is relax, read our SEO migration guide and include it in your redesigning project!
So here goes:
PRE-REDESIGN ACTIVITIES
SEO involvement in the website migration process should start from the moment the decision to redesign has been made.
STEP 1 [Audit Your Existing Site]
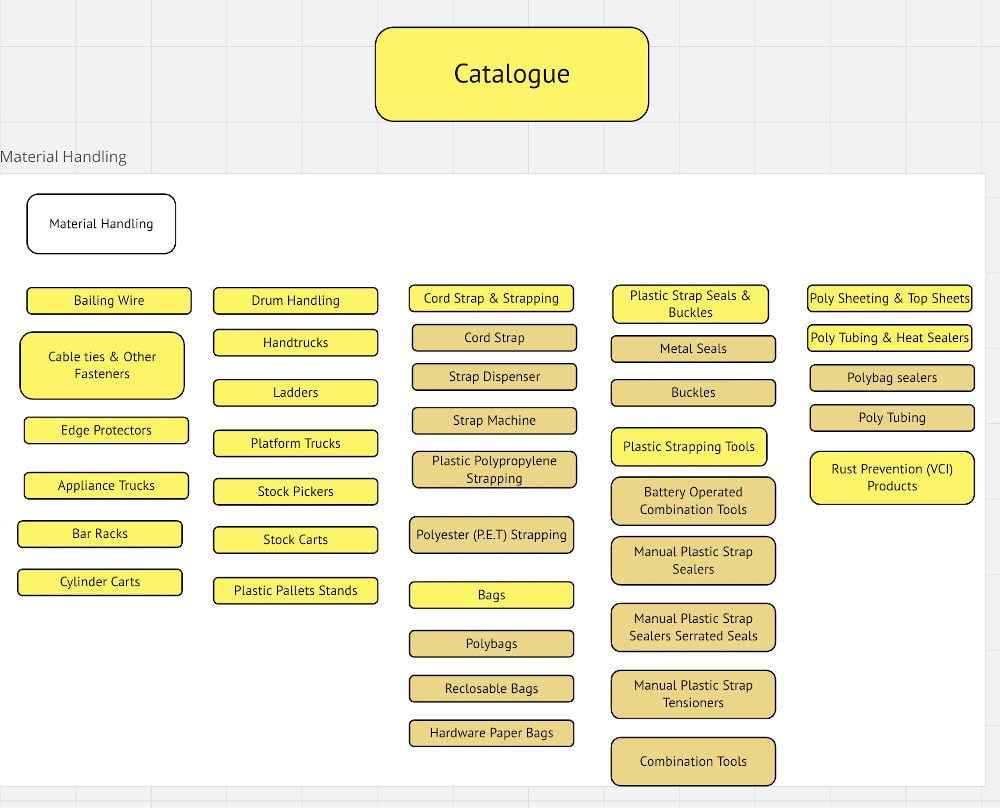
Redesigning is a great opportunity to "declutter" your website from useless pages. Analyze your old structure to see what content should be removed and what should be added. Create a new comprehensive architecture diagram and move to step 2.
STEP 2 [Content Update Planning]
If you are planning to change the text content and update marketing messages, create a new content mockup for each page.
STEP 3 [Pre-Redesign Brainstorming]
Setup a pre-redesign brainstorming session with designers, front and back-end developers to ensure the new site meets the latest Google's requirements and is fully optimized from all digital angles.
On this session you need to:
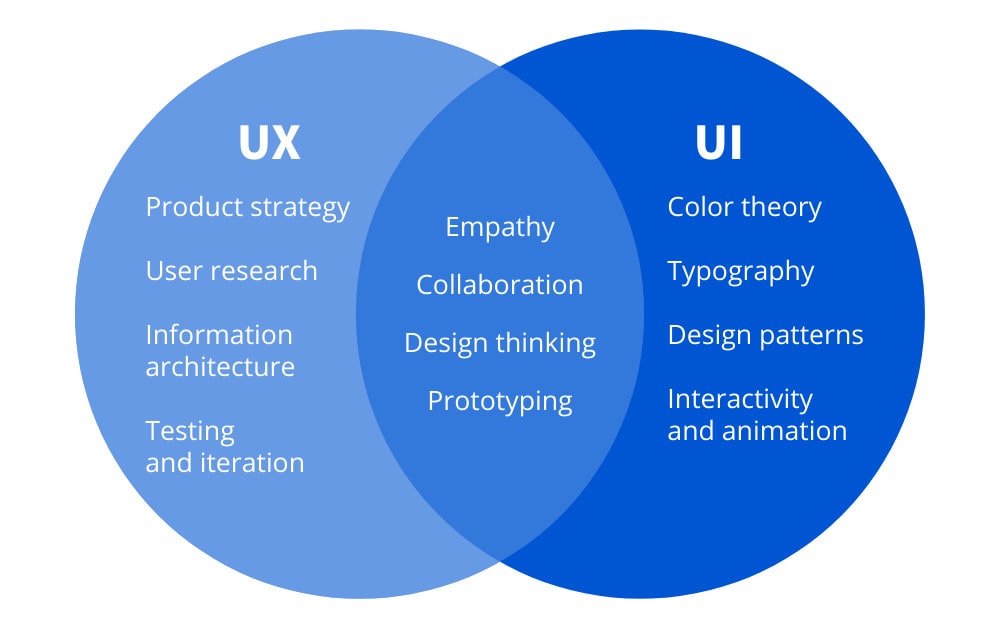
1. Present your vision of the new website and content structures to designers, and discuss its compatibility with UX and UI design principles. Adjust the structure if necessary.
2. Make sure front-end developers understand the importance of optimizing images, JavaScript and CSS files for fast site loading speed (Site Speed is an important Google's ranking factor, so don't be afraid to make a big deal out of its optimization).

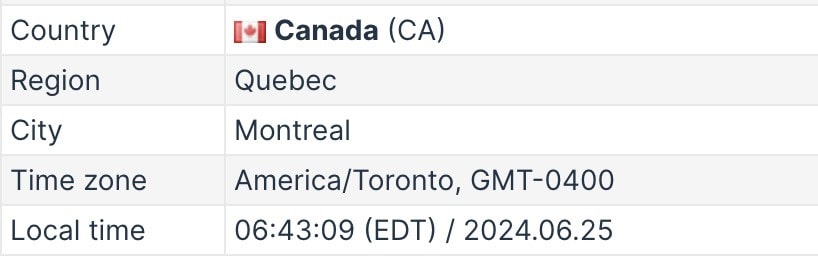
3. Rethink your server location with programmers (if needed). Again, Site Speed matters for SEO, and server location matters for site speed. Host your site in the country where your main visitors are. If you target Canada, host in Canada.
It is very important to ensure all professionals involved in the redesign project are on the same page from the very start. The lack of communication between departments always leads to missed deadlines, extra costs and stress. Smart planning and communication is key to your website redesign success.
SANDBOX STAGE
STEP 4 [Finalizing Content and Preparing for SEO Migration]
When the final website architecture and content structure is developed and approved by all professionals involved, move to the new content production. Once the new content is delivered, proceed to developing an A to Z SEO Migration Protocol for your web dev team.
STEP 5: [Developing an SEO Migration Protocol.]
Once the new content is in place, it's critical to maintain your website's SEO performance during the transition. Develop a comprehensive SEO Migration Protocol that includes detailed steps for URL mapping, 301 redirects, updating internal links, and verifying backlinks . Coordinate closely with your web development team to implement these changes, test the new setup, and monitor performance post-launch to address any issues promptly. This protocol is essential for preserving search engine rankings and ensuring a smooth transition without losing traffic or visibility.
Website Migration Checklist:
1. A detailed navigation and internal linking plan.
2. A detailed plan for creating new pages and transferring existing content from OLD to NEW website URLs.
3. A list of optimized SEO titles and Meta Descriptions for all website pages.
4. A list of optimized Alt texts for all images.
5. A 301-redirect map. Very important if you are changing URLs structure on the new website! Without 301 redirects from OLD to corresponding NEW URLs, you will lose SEO equity accumulated on the old website and your rankings will drop. Also, don't forget to provide instructions for canonical 301 redirects.
6. A list of Google's website performance tracking codes to be transferred to the new site. This includes:
- Google Analytics code
- Google Analytics event trackers
- Google Search Console
- Google Tag Manager
7. Instructions for canonical tags implementation. Add self-referencing canonical tags to all website pages to protect your content from pesky scrapers.
8. Instructions for adding Schema Markup for Local Business, articles, videos, Q&A, etc.
9. Instructions for transferring/installing SSL certificate and making the website navigation and content HTTPS-friendly. HTTPS websites get ranking boost from Google. Make sure you activate this competitive advantage for your site.
10. Requirements to Robots.txt and XML Sitemap.
PRE-LAUNCH STAGE
STEP 6: [Make a detailed SEO audit to ensure]
- All SEO Migration Protocol instructions were implemented properly.
- The content is fully transferred, and new pages are created.
- All SEO elements are optimized for keywords , nothing is missed.
- The Site Speed meets the latest requirements.
- The website looks good on both desktop and mobile devices.
AFTER-LAUNCH STAGE
A lot can go wrong when the new website is rolled out. So, NEVER skip the after-launch SEO QA even if you checked the website 10 times already! The final SEO QA should be performed within 1-2 hours after the new site went live. If any errors are found, you will have time to fix them before Google starts indexing your new design.
STEP 7 [Your after-launch SEO QA should consist of the following]
1. Check if all 301 redirects from OLD to NEW website pages work properly. This tool can help you with this. Make sure the redirects are 301, not 302! Only 301 redirects will pass the SEO equity to the new website structure.
2. Make sure your canonical 301 redirects are set up. The website should be available only under your main canonical version (HTTPS NON-WWW or HTTPS WWW) all other versions, such as HTTP, HTTP WWW, HTTPS NON-WWW or HTTPS WWW should be 301 redirected to your canonical version. Also, make sure the canonical version appears in navigation, sitemap XML, Robots.txt, canonical tags and other elements of your site.
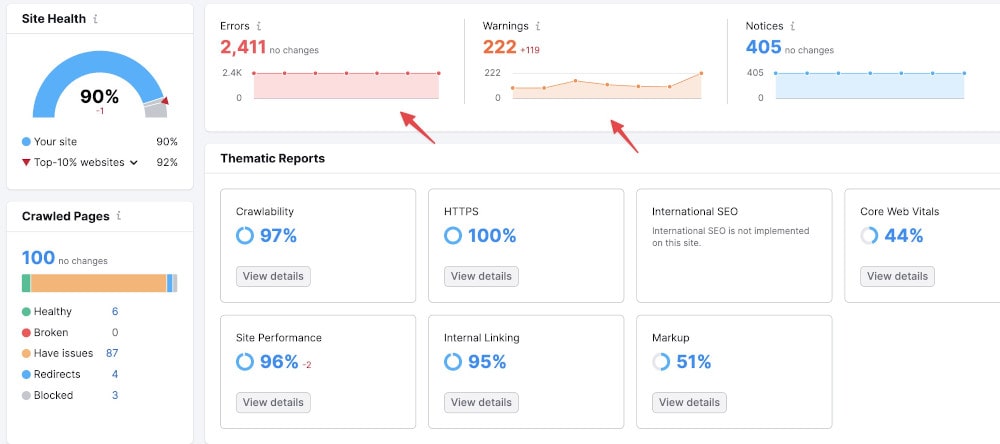
3. Run Semrush audit to identify and fix any mixed content issues, internal/external broken links, 404 pages that were missed in the redirect map, orphan pages, etc.
4. Once again check the Site Speed in the live environment. Use the following tools for this:
If any issues are detected, forward them to dev team ASAP!
5. Make sure the Robots "noindex" is removed from page headers or the Robots.txt file after launch. You may be surprised, but we have seen this many times: In the launching rush, people forget about this small but extremely important step — opening the website for search engines' indexation. Don't be one of them!
6. Make sure the Structured Data is implemented properly. Use Google's testing tool to check this.
7. Check Google Analytics to see if data is collecting properly. Test your event trackers.
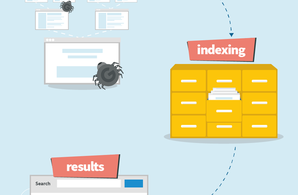
STEP 8: [Submitting Your Sitemap and Requesting Indexing]
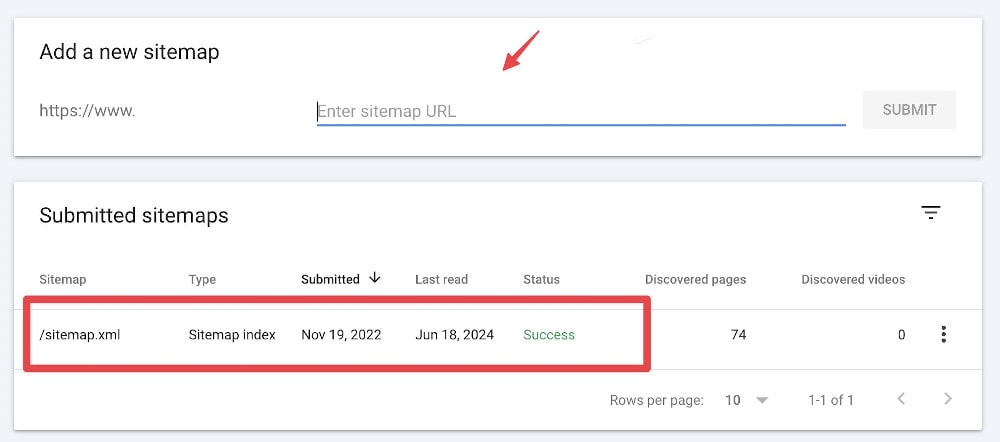
Once you ensured all SEO elements are in place and in order and the new website is fully prepared for meeting Google and other search engines, submit your new XML Sitemap to Google Search Console and request indexing of your home page and main category pages.
FIRST 2 WEEKS AFTER LAUNCH
STEP 9 [Set up an ongoing daily monitoring of]
- Google Search Console - to be able to timely fix Coverage errors if they appear.
- Google Analytics - to timely identify any negative tendencies in Organic Traffic.
- Your ranking tracking tool - again to make sure you can timely react on any changes in website's Organic Search visibility.
CONCLUSION
Migrating your website to a new design can be a hassle, but if you are guided by the principles of smart planning and effective internal communications, you can be assured of success!
Keep this in mind and arm yourself with our Website Migration SEO Checklist not to miss any important steps in your redesigning project!
If you need expert assistance to ensure a seamless and successful migration, don't hesitate to contact SeoLogist . Our team of SEO professionals is here to help you navigate the complexities of website migration and achieve optimal results. Reach out to us today and let's make your website migration a success together!
SEO Migration FAQs
How do you decide when is the safest time to launch a website migration?
The best moment is usually a quiet period in your sales cycle, when you can afford a little volatility without hurting revenue. Avoid peak seasons, large campaigns, or product launches so that traffic changes are easier to attribute to the migration itself. Plan enough time after launch for monitoring, fixes, and reindexing rather than pushing the switch right before holidays or promotions. This gives search engines space to process redirects and new pages without pressure.
Should you change your URL structure during a redesign or keep it as close as possible to the old one?
If your current URLs are already clean and descriptive, keeping them largely intact reduces risk and simplifies your redirect map. Major URL overhauls make sense only when the old structure is deeply flawed or blocks future growth. When you do change paths, every old address should have a clear, one to one 301 redirect to its new counterpart, which Google treats as a strong signal to transfer relevance to the new URL.
How much ranking and traffic fluctuation is normal after a migration?
It is common to see a temporary dip in impressions and clicks while search engines recrawl your site, process redirects, and settle on new canonical URLs. For many sites this adjustment period lasts a few weeks, with gradual recovery as long as technical issues are minimal. Large drops that continue beyond that window usually indicate problems such as missing redirects, blocked crawling, or incorrect canonicals. Comparing pre and post launch data in Google Search Console and analytics helps you spot whether the pattern looks like a normal adjustment or a deeper issue.
What is the safest way to use a staging environment without harming SEO?
Your staging site should be fully crawlable for your internal tests but clearly off limits for public indexing. The simplest pattern is to protect staging behind authentication or use a noindex directive so that even if bots discover it, they do not treat it as competing content. Relying only on robots.txt is risky, because robots rules manage crawling rather than indexing and may still allow URLs to appear in some cases. Google’s robots.txt documentation notes that it is not a reliable method for keeping pages out of search.
How important is it to choose the correct redirect type during a migration?
Redirect type tells search engines how permanent your move is meant to be, so it directly affects how quickly and how fully signals are transferred. A 301 redirect is treated as a permanent move and is a strong hint that the target URL should become the canonical version, while temporary 302 responses send a weaker signal. Using 302s on permanent URL changes can slow or confuse reindexing. Google’s redirect guidance explains that choosing the right status code is part of how they decide which page to show in results.
When do you need to use the Change of Address tool in Google Search Console?
This tool is designed for domain or host moves, such as migrating from olddomain.com to newdomain.com, not for simple design changes on the same domain. You should set up 301 redirects first, then submit the move in Search Console so Google can connect the old and new properties more directly. For redesigns that keep the same domain, the tool is unnecessary and you can focus on clean redirects and updated sitemaps. Google’s help resources describe the Change of Address tool specifically in the context of domain level moves.
How should performance and Core Web Vitals be handled during a migration?
A redesign is an ideal time to fix legacy performance issues rather than adding more weight to already slow templates. Before launch, test key templates with PageSpeed Insights to see how they perform on metrics such as load time and visual stability, then hand those recommendations to your developers. After going live, retest in the production environment to verify that real world performance matches your staging assumptions. Google’s PageSpeed Insights documentation explains how the tool evaluates both mobile and desktop experiences and suggests concrete improvements.
What are common robots.txt mistakes during a site migration?
One frequent mistake is leaving a temporary disallow rule in place after launch, which prevents crawlers from accessing your new pages. Another is blocking important resources such as JavaScript or CSS files, which can stop search engines from rendering your layout correctly. Mixing blocked URLs in robots.txt with references to those same URLs in sitemaps also sends confusing signals. Guidance on robots.txt best practices points out that misconfigurations during migrations can delay or damage reindexing if they are not caught quickly.
How can you coordinate with external partners to protect SEO during a redesign?
If you have important links from partners, directories, or media sites pointing at URLs that will change, let those contacts know in advance. After launch, send them the new destination URLs so they can update their pages, which reduces the number of redirects users and bots must pass through. For key links that cannot be changed, verify that your redirects are fast and direct rather than long chains. This combination preserves referral traffic and keeps external signals aligned with your new architecture.
What should your team do in the first month if you notice unexpected SEO problems after migration?
Start by confirming that tracking is accurate, then review coverage and error reports to see whether issues cluster around specific sections, templates, or devices. Check for missing or incorrect redirects, blocked areas, or pages that lost internal links during the redesign. When you identify a root cause, fix it and request indexing for important URLs in Search Console to speed up recovery. Documenting both the issue and the fix will make your next redesign smoother and reduce the chance of repeating the same mistake.